This is where design and layout comes into play.
The DIV tag
Probably one of the most powerful tools at your disposal for designing your webpage is the
So for example, like I mentioned, let's design a webpage that has a bunch of text on the left hand side (perhaps about 3/4 of the page), and we'll allow for about 1/4 of the right hand side to hold images. Here's a picture to add some context to what I'm talking about:
Before I jump into the code, I want to talk a little more about the DIV tag.
In order to define an area for a particular part of your website, you'll need to specify a few pieces of information:
- How wide the area should be
- How tall the area should be
- Where exactly the area should appear on the webpage
With this basic information, you have the building blocks for creating the layout of your webpage!
The Code
So let's start with the code for the left 3/4 of our website. We should think how wide and how tall we want this area to be… Since I said it should take up 3/4 of the screen, and most computer monitors these days are at least 1080p, it's safe to assume that the total width of our website will be 1000 pixels wide.
Note: When designing a webpage, it's handy to think in terms of pixels. If you don't know what a pixel is, you have read through this great article.
So if our website is 1000 pixels wide, the 3/4 of that would be 750 pixels right? Now we need to decide how tall this area should be, let's say that 500 pixels will do the trick!
Alright, armed with this information, let's create our DIV
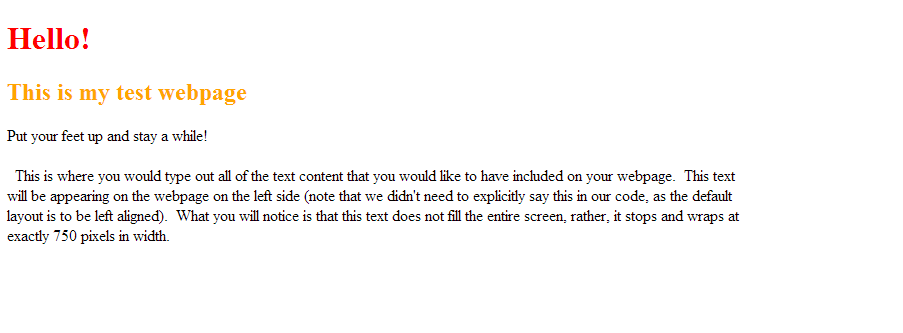
This is where you would type out all of the text content that you would like to have included on your webpage. This text will be appearing on the webpage on the left side (note that we didn't need to explicitly say this in our code, as the default layout is to be left aligned). What you will notice is that this text does not fill the entire screen, rather, it stops and wraps at exactly 750 pixels in width.
Okay, so when you place this code inside of your existing webpage example, here's what the output will look like:
Pretty simple so far right? Here's where things get only slightly more complex. Now we need to add the DIV that will house the images along the right hand side of the page. To do this, we still need to outline the height and width of the area, but we also need to indicate that we want it to be positioned to the right of the first DIV. In order to do this we will need to utilize the float property:
  Java Video Tutorials


  Java Tutorial eBook

Now let's take a look at a snapshot of what the entire HTML code looks like:
      Introduction to HTML


    Hello!
    This is my test webpage
    Put your feet up and stay a while!


	    This is where you would type out all of the text content that you would like to have included on your webpage.  This text will be appearing on the webpage on the left side (note that we didn't need to explicitly say this in our code, as the default layout is to be left aligned).  What you will notice is that this text does not fill the entire screen, rather, it stops and wraps at exactly 750 pixels in width.

		  Java Video Tutorials


		  Java Tutorial eBook

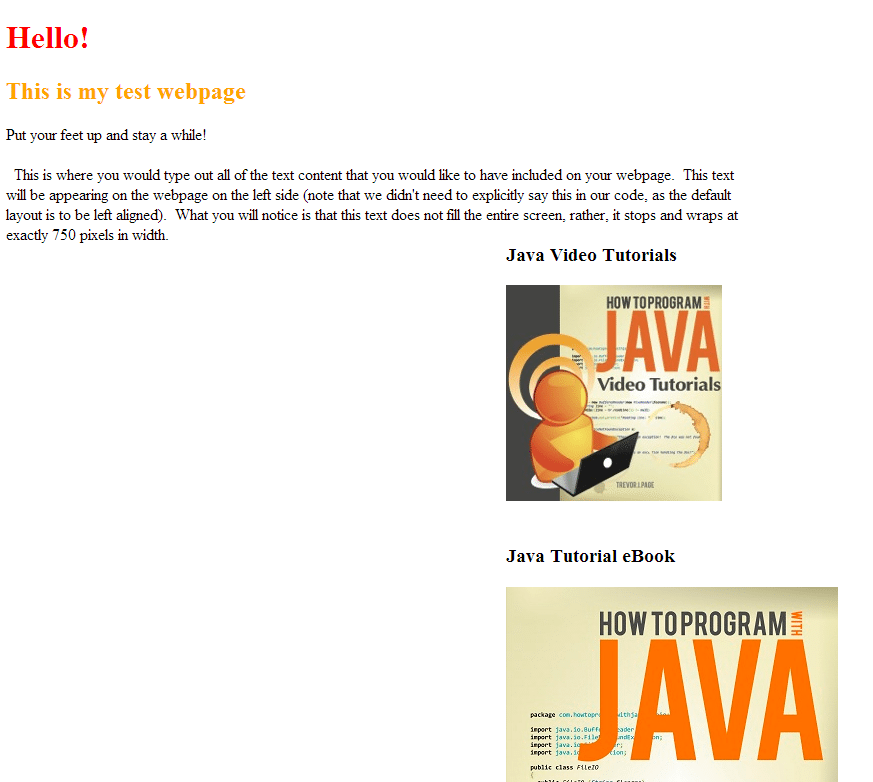
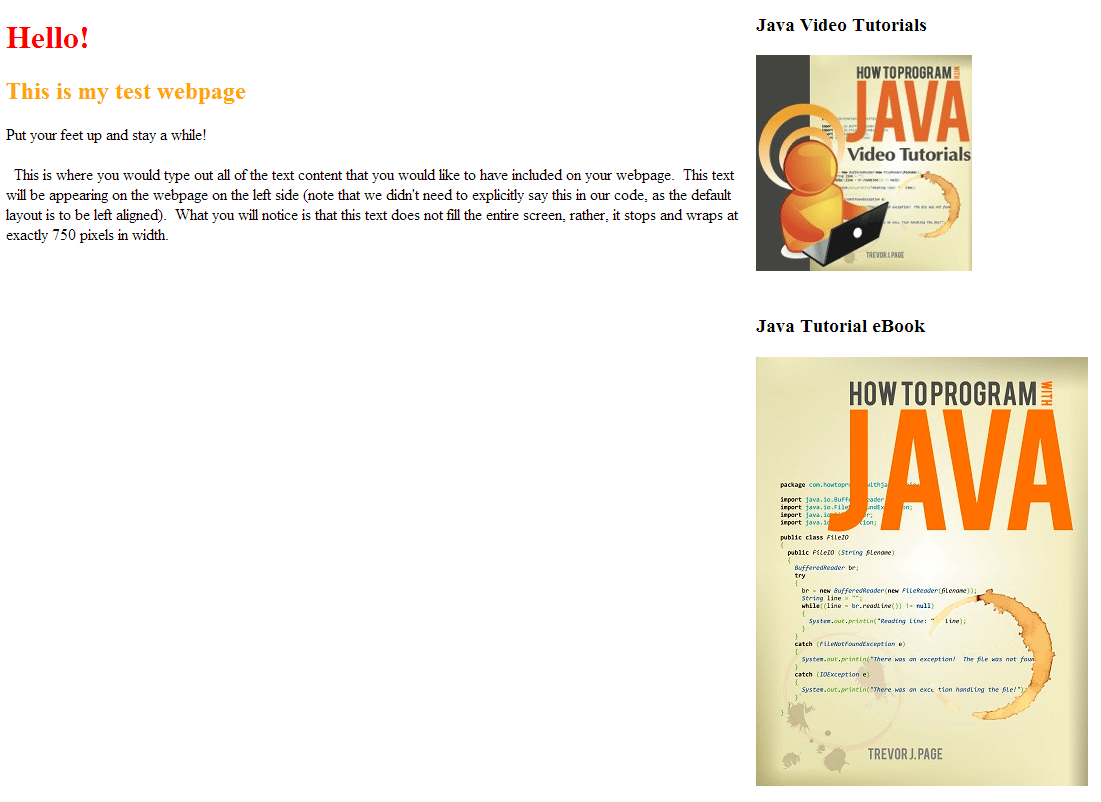
Okay, so we're not done quite yet. There's still some formatting and aligning that we'll need to do. Let me show you a screenshot of what the resulting web page will look like:
Notice how the “image sidebar” we've created is in the bottom right corner of our web page? That doesn't look right now does it!
We'll need to tweak our styles a bit to make everything look nice. All we need to do is move the sidebar over to the right a bit, and move it up a bit. This can be done using two properties: margin-top and margin-right.
Let's update our image sidebar's style tag to include these margin tags:
  Java Video Tutorials


  Java Tutorial eBook

And finally, here's what our web page looks like with these modifications:
Voila! You've now learned how to add some layout and design to your web page, congrats :)
Note: It's good practice to remove all the style tags from within your HTML code and move it into a CSS file. This way you nicely “separate” the layout and design code from the actual HTML coding.
Cool, awesome, great, wonderful… If you enjoyed this tutorial and want to know when more of these things are published, just sign up for my mailing list below and I'll letcha know the moment a new tutorial goes live.
Happy Learning
